
Whether your patch design feels outdated, was applied in the wrong spot, or you simply want a fresh look, knowing how to remove iron on patches correctly can save your favorite garment. Done wrong, it can leave sticky residue, scorch marks, or even tear the fabric. This guide walks you through every proven method including heat, solvent, and freezing, plus fabric-specific tips so you can remove iron on patches cleanly and confidently.
Stuff You’ll Need
- Iron or hairdryer to apply heat
- Thin cloth or pressing towel to protect the fabric
- Adhesive remover or nail polish remover to dissolve glue residue
- Plastic scraper or old credit card to lift edges without scratching
- Tweezers for precise peeling
- Zip-lock bag for the freezing method
How to Remove Iron On Patches
Using Heat
- Get Your Iron Ready: Plug in your iron and set it to the highest safe temperature for your fabric. Use higher heat for cotton and denim. For polyester or other synthetic fabrics, use a lower heat setting to prevent damage.
- Cover the Material: Just like you do when applying iron on patches. put a thin cloth or towel on top of the patch. This keeps the fabric safe from direct heat and prevents burning or staining.
- Use Heat: Press the iron on the cloth over the patch for 15-20 seconds. The heat will make the glue soft so the patch comes off easier
- Peel Immediately: While the adhesive is still warm, use a plastic scraper or your fingernail to lift a corner and slowly peel the patch away. Work from one edge across and do not pull straight up. If the patch resists, reheat and try again. Patience here prevents fabric tears.
Using a Liquid to Remove
- Put on the Remover: Apply glue remover or nail polish remover to the back of the patch. Check it on a small hidden spot first to make sure it won’t harm your fabric.
- Let It Soak: Give the remover 2 to 3 minutes to penetrate and soften the adhesive layer before attempting to peel.
- Remove the Patch: To remove the patch use your nails to peel it. If it doesn’t budge, use a plastic scraper or try applying more solvent.
- Clean the Fabric: Wash the fabric to remove any solvent.
Freezing Method
- Chill the Clothing: Place the garment in a zip-lock bag and put it in the freezer for 1 to 2 hours. The cold makes the glue brittle, making the patch easier to remove.
- Peel Off the Patch: Bring the clothing out of the fridge while its cold and peel it off
- Clean Up: Use something to scrape off the leftover glue and wash the fabric as usual.
How to Remove Iron On Patches Using a Hairdryer
A hairdryer is a gentler alternative to an iron and works well for delicate fabrics or small patches.
- Set your hairdryer to medium-high heat and hold it 2 to 3 inches from the patch.
- Heat the patch for 30 to 45 seconds until the adhesive softens.
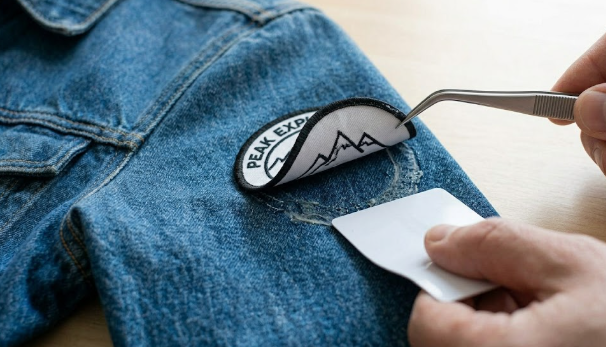
- Use tweezers or a plastic scraper to peel the patch off while it is still warm.
This method gives you more control and is less likely to overheat sensitive fabrics.
How to Remove Adhesive Residue After Patch Removal
Even after the patch is off, sticky residue often remains. Here is how to clean it:
- Apply a small amount of adhesive remover to a clean soft cloth
- Gently rub the residue in circular motions until it lifts
- For stubborn spots, let the remover sit for 5 minutes before scrubbing
- Wash and air dry the garment before checking if residue remains
- Repeat if necessary and do not scrub aggressively as this can damage the fabric
Tips for Different Fabrics
To take care of each patch, you first have to understand the type of fabric it uses.
Here are some easy tips:
Cotton
Cotton is strong and can handle heat quite well. When ironing cotton clothes, set the iron temperature to high. Make sure to place a thin cloth between the iron and the garment to protect the fabric from any direct heat damage. When washing the cotton, you can use warm water as well. But before doing anything make sure to read the label.
Polyester
This type of fabric is a little different from cotton and requires more care. When you iron polyester clothes, try to keep the heat setting to low. High temperatures can make the polyester melt and lose its shape.
Denim
Denim is a more durable and thick cotton fabric and can handle high levels of heat easily. To remove an iron-on patch from denim, you’ll need an iron. You can begin by heating your iron to medium-high setting. Then place wax paper or a thin cloth over the patch to protect the denim from direct heat. Then press the heated iron on the patch for about 15-20 seconds to soften the adhesive.
Delicate Fabrics (Silk, Lace, Thin Synthetics)
Avoid heat entirely on delicate fabrics. Use the freezing method or apply a very mild solvent, and work as slowly and gently as possible. If you are unsure, take the garment to a professional cleaner to avoid permanent damage.
Now lift the patch from edges with tweezers or a blunt knife very carefully and peel it off gently. If any adhesive residue remains. Apply an adhesive remover according to its instructions. Finally, wash the denim fabric to remove any leftover adhesive and ensure it is clean and ready for use.
Common Mistakes to Avoid
- Skipping the test patch: Always test solvents on a hidden area of the fabric first
- Pulling the patch without preparation: Always heat or freeze first or you risk tearing the fabric
- Using high heat on synthetic fabrics: Polyester and nylon can melt permanently
- Scrubbing residue with a rough cloth: Always use a soft cloth to avoid pilling the fabric
- Rushing the process: Working too fast is the number one cause of fabric damage
Frequently Asked Questions
Will removing the patch damage my fabric?
If done correctly, removing the patch should not damage the fabric. Always test any adhesive solvent on a small hidden area first. Use a cloth to protect the fabric when applying heat. Work slowly and carefully and never rush the peeling process. Most fabric damage happens from impatience, not the removal method itself.
Can I reuse the patch?
Typically no. Most patches lose their adhesive backing after removal and will not stick properly a second time. If you want to reattach the same patch, sewing it on is a more reliable and permanent option. You can also look for patches labeled as reusable, but keep in mind they may not hold as firmly as the original application.
How do I clean the residue?
Get yourself an adhesive remover to remove the sticky residue from behind the patches. Put some of the solution of the remover into a cloth and rub gently on the affected area. After the residue loosens, wash the fabric as usual.
If the residue is not removed, just repeat the whole process.
How to remove iron on iron on letters for t-shirts?
Removing iron-on letters follows the same process. Start by heating the letters either with an iron or a hairdryer to loosen the adhesive. If heat doesn’t work you can also use a solvent designed for fabric. Freezing the shirt can also make the adhesive brittle which can make it easy to scrape off. Be patient while removing to avoid any damage to the fabric, especially of the shirt is delicate.
What is the best method to remove iron on patches?
For most fabrics, the heat method works best and delivers the fastest results. For delicate or synthetic fabrics, use the hairdryer or freezing method to reduce the risk of heat damage. Solvents work best as a finishing step to clean up any adhesive residue left behind after the patch is removed.
Get a New Custom Patch
Now that you know how to remove iron on patches using heat, solvents, and freezing, you can refresh any garment without causing damage. The key is matching the right method to your fabric type, working slowly, and always cleaning up any adhesive residue once the patch is off. Follow these steps carefully and your clothes will look clean and ready for whatever comes next.
