
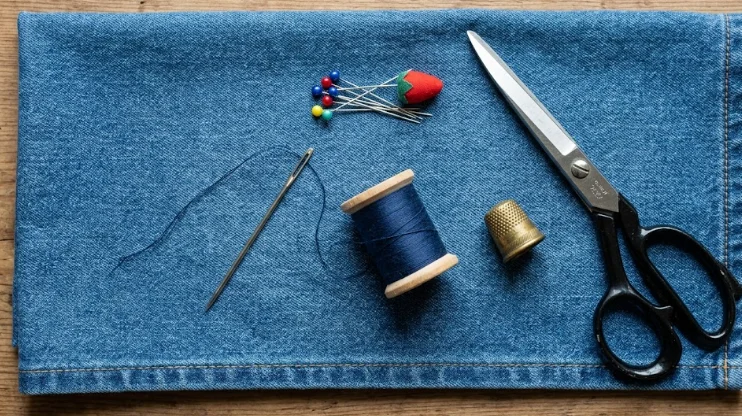
To attach a patch, place it on the clean and ironed material and fasten it with either pins or fabric glue. The stitching should be done all around the patch border with either the backstitching method by hand or the straight and zigzag method using the sewing machine. Matching colors should be used for both fabric and thread. Time needed: 5–20 minutes.
If you have just received a premium emblem from Patch Makers USA and are wondering exactly how to sew on your new patch, you have arrived at the ultimate resource. While many guides offer basic tips, this is the most complete, practical, USA-first patch sewing guide available.
We are diving deep into everything from hand techniques to complex machine setups, tackling specialty fabric scenarios, and offering a manufacturer’s inside knowledge so you can achieve professional results every single time.
Sewing vs. Iron-On: When Sewing Is the Right Call
When it comes to putting the badges on, the discussion about whether one should choose sewing or ironing prevails. An advantage of ironing is that the iron-on backing offers an extremely convenient method of attaching your badge in minutes.
Nevertheless, sewing is much more durable. Firstly, there is no glue involved that will be destroyed under the effects of heating, detergents, or even washing machines’ action. The second benefit is that a mechanical connection formed by the thread is incredibly resistant.
Finally, there are types of fabrics for which ironing is not suitable at all. You must never iron patches onto any leather or suede clothing, on nylon and silk fabric, or on any heavily textured fabrics. The patching process requires heat, which will either burn or melt those types of fabric.
If you want the most effective and long-lasting results, there is nothing like the belt-and-suspenders method: iron-on, and then sew-on. That way, you can use the adhesive for the perfect fit and the sewing thread for its permanency.
Learning how to attach a patch by sewing is completely necessary for military clothing, professional uniforms, scout patches, biker club jackets, and any other patch that will undergo rigorous activity.
On the other hand, using an iron-on method alone is sufficient for leisure wear, less strenuous activities, and materials like ordinary cotton, which have great adhesion properties with heat-adhesive products.
What You Need Before You Start
Preparation is the key to doing something successfully. In order to know how to sew on a patch, you need to have the right tools.
Tools and materials checklist
| Item | Purpose | Notes |
| Needle | Stitching | Size 80/12 for most fabrics; size 100/16 for denim/canvas. |
| Thread | Attachment | Match patch border color for invisible stitches; contrast for decorative effect. |
| Pins or wonder clips | Positioning | 2–4 pins for small patches; 4–6 for larger ones. |
| Scissors | Thread trimming | Sharp embroidery scissors are ideal for clean cuts. |
| Thimble | Finger protection | Essential for thick fabrics like denim, leather, or canvas. |
| Fabric marker/chalk | Placement marking | Optional but highly useful for ensuring precision. |
| Iron (optional) | Pre-pressing | Flatten fabric before sewing; tack iron-on patches before stitching. |
| Temporary fabric glue | Patch stabilization | Excellent alternative to pinning for curved surfaces and bags. |
Choosing the right needle
Choosing the needle determines whether the thread can pass through easily. You would want to avoid selecting an inappropriate needle since it will give you a tough time and result in missed stitches.
- Universal needle (size 70–80): This is the most suitable when sewing ordinary cotton fabrics and light materials and applying lightweight woven patches.
- Denim needle (size 90–100): If you are wondering what needle for sewing patches on denim works best, then this one fits the bill. This needle features a reinforced blade that can easily penetrate through thick materials like denim, jackets, canvas, and backpacks.
- Leather needle (size 90–100): Ideal for sewing leather jackets and bags. This needle is not like the other ones. It does not have a point but rather a cutting tip (wedge point) that cuts through the leather.
- Stretch/ballpoint needle: These should be used on polyester-blended and knitted fabrics as well as sportswear.
Choosing the right thread
The secret to professional-looking application often comes down to thread color for patch sewing.
- Match the thread color precisely to the patch border for nearly invisible stitching. Most custom embroidered patches feature a distinct merrowed border; matching this border hides your stitches completely.
- For a different look, consider a thread that contrasts sharply with the material so that the stitches can be seen clearly (they come out beautifully on vintage denim).
- Cotton or cotton-poly blend: This is the universal standard that works beautifully on most natural and blended fabrics.
- Polyester thread: This synthetic thread is stronger, highly stretch-resistant, and ideal when learning how to sew a patch on a jacket or a heavy-duty tactical bag.
- Thread weight: Always choose a regular 50-weight thread. If the fabric is especially heavy, a 40-weight thread will do just fine.
Preparing Your Patch and Garment
Rushing the preparation phase is the most common mistake beginners make. Proper garment prep ensures the emblem lays flat and stays put.
Step 1: Wash and dry the garment first
Usually, when you first wash any new fabric after sewing and using it, most new fabrics will shrink after the first wash. If you sew a patch onto a piece of unwashed or factory-made fabric that has not yet had a wash, as such, the patch will, after being washed.
Create a severe buckle (a wrinkled or twisted shape) at the area of the patch where it was sewn onto the new fabric because the patch itself is unlikely to shrink with the new fabric.
So, therefore, whether you have sewn a patch onto an expensive garment or not, always treat the garment as though it were new by washing and drying it in the same manner as you usually would. Be careful about drying at high temperatures if there is any type of synthetic fiber in the new garment fabric.
Step 2: Iron the garment
A perfectly flat, smooth surface is absolutely essential for accurate patch placement. Wrinkles hidden beneath the backing will become permanently locked in once you begin stitching.
Pay particular attention to the specific area where the patch will sit, pressing it firmly. For those utilizing the iron-on combination method, you will apply the heat-activated backing at this stage to lock it down before moving to the needle and thread.
Step 3: Position and secure the patch
Take time on patch placement before sewing. There are no “undos” once the stitching is done. Place the shirt on the table entirely flat. Position the patch in its correct spot and move away to see how good the visual placement is. You should always use a measuring tool in order to get precise results, especially when it comes to placing chest logos or military sleeve patches.
Now that the patch is placed properly, learn how to pin a patch before sewing. You should always pin from the middle, outwards, rather than pinning from the edges. This prevents your patch from buckling upward. When you deal with heavy materials, use two pins forming an “X” in the middle of the patch. Another option is to use fabric glue or double-sided tape for hard-to-pin areas such as hat crowns or shoulder curves.
How to Sew On a Patch by Hand: Step by Step
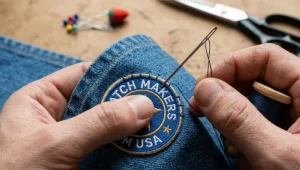
How to hand sew a patch is an essential skill that requires very little in terms of materials but offers great durability. To learn how to sew patches by hand professionally, perfecting your stitches is a must.
The Best Stitches for Hand-sewing Patches
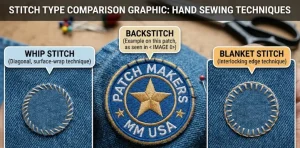
Selecting the proper stitch type for sewing on patches makes all the difference in aesthetics and longevity.
Backstitch (recommended for strongest hold): The backstitch for patches creates a continuous, unbroken line of stitches with absolutely no gaps. It is the closest equivalent to machine stitching you can achieve by hand.
How to do it: Bring your needle up just inside the patch edge, go back one stitch length, and then come up one stitch length ahead.
Result: A clean, highly even line that holds exceptionally well through years of harsh washing.
Best for: All patch types, especially when focusing on merrow edge patch sewing.
Whip stitch (best for quick attachment and decorative effect): The whip stitch patch technique involves wrapping the thread over the edge of the border at regular intervals. It is slightly visible and can be utilized as a design feature if you choose a contrasting thread. It is faster than the backstitch but slightly less secure. It is best for casual wear, decorative fashion items, and large blanket-edge patches.
Blind/slip stitch (for invisible results): The blind stitch patch method catches only a few microscopic threads of the patch backing and the garment underneath. This is exactly how to sew on a patch without it showing. It is nearly invisible from the front but requires a slower pace and intense precision. It is best for situations where visible stitching would ruin a sleek garment’s aesthetic.
Blanket stitch (for patches without defined borders): The blanket stitch patch technique works around the raw edge of an emblem, catching both the patch and the garment to create a visible, decorative border. This provides that classic, nostalgic Boy Scout badge look. It is best for laser-cut patches without merrowed or defined edges.
Hand sewing step by step
- Thread your needle with approximately 18 inches of thread. Double the thread for extra strength and tie a secure knot at the end. Waxing the thread lightly on a piece of beeswax significantly reduces frustrating tangling.
- Starting from the inside (back) of the garment, push the needle up through both the garment fabric and the very edge of the patch. Come up just inside or just catching the thick patch’s border.
- Work your chosen stitch around the entire perimeter. The key to how to attach a patch by sewing flawlessly is keeping your stitches consistently spaced (2–3mm apart for a backstitch; slightly wider for a whip stitch).
- At corners, take an extra anchoring stitch to secure the sharp turn without creating visible bunching.
- Periodically stop and check the front of the garment to ensure the patch isn’t subtly buckling or shifting off its axis.
- When you complete the full circuit, finish with a double or triple knot on the back of the garment, pulled tight and hidden against the fabric. Trim the thread cleanly.
- Inspect the edges carefully. Any skipped areas or loose gaps should be re-stitched before calling the job complete.
Hand-sewing tips from experience
- Always use a thimble. Tough materials like denim, canvas, and heavy twill will push back forcefully against the needle eye, saving your fingers from painful punctures.
- Short, evenly spaced stitches hold vastly better than long, fast ones. A spacing of 2–3mm is the absolute sweet spot for durability.
- If your thread continuously knots upon itself, try threading the needle with the direction the thread naturally comes off the spool.
- For thick sections (especially where garment seams overlap), drastically slow down your pace and push the needle through deliberately and perfectly straight to avoid snapping it.
How to Sew On a Patch with a Sewing Machine: Step by Step
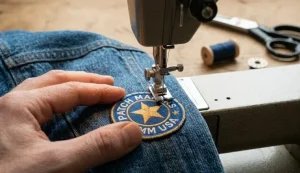
When you have a large batch of uniforms or heavy-duty gear, learning how to sew on a patch with a sewing machine saves incredible amounts of time and finger strain.
Machine settings for patch sewing
| Setting | Recommendation | Notes |
| Stitch type | Straight stitch | Clean, subtle look; use zigzag for extra heavy-duty hold. |
| Stitch length | 2.5mm | Shorter for lightweight fabric; longer for heavy denim. |
| Thread tension | Standard (4–5) | Always test on a piece of scrap fabric first. |
| Needle | Size 80/12 general; 90/16 denim | Match the needle size precisely to the fabric weight. |
| Presser foot | Clear/open-toe foot | Highly recommended for better visibility along the tight edge. |
Machine sewing step by step
- To correctly adjust your sewing machine, make use of the information from the chart provided above to select suitable thread, needle, and stitch type for your sewing task. Prior to stitching anything that requires embroidery, one should try out his/her sewing task on a piece of scrap fabric having the same weight as the intended fabric.
- Use pins or temporary adhesive to hold your emblem in place prior to sewing it onto a piece of clothing. Try not to pin closer than 1/2″ from the outer edge of your emblem in order to allow for the removal of the pins when you are sewing near them with the presser foot down.
- Position the presser foot directly above the outer edge of the emblem, and sew from the simplest straight area to the more complicated angled areas.
- Exercise great care not to sew any closer than 1-2 mm from the outermost edge of the patch while stitching the whole periphery. The former may result in the foundation being shorter than the patch, while the latter can cause curling at the periphery of the patch over time.
- For making an uninterrupted stitch while sewing around the corners, stop with the presser foot down. Take the presser foot off, turn the clothing, and start sewing again.
- When you reach your starting point, reverse and backstitch 3–4 stitches to lock the thread in permanently. Do not rely on a standard knot alone for machine-sewn applications. The backstitch is your absolute lock.
- Trim the threads closely on both the top surface and the bobbin side inside the garment. A second pass with a tight zigzag stitch directly over the straight stitch adds phenomenal extra security for gear that will be washed frequently.
When to use zigzag vs straight stitch
- Straight stitch: Conveys a neat and very professional appearance. Works well for all types of structured clothing, company uniforms, and traditional jackets.
- Zigzag stitch: Gives a much more robust and multi-directional adhesion. It is very noticeable and gives a rugged look, making it the right one for use with luggage, plate carriers, or active wear, which stretches quite aggressively.
- Satin stitch (very tight zigzag): Creates an extra layer of noticeable embroidered border that works really well on raw canvas or on patches that do not have an already-made merrowed edge.
Obstacles and how to handle them
- Sleeves: Attempting to determine how to sew a patch on a shirt sleeve can prove difficult. Use a free-arm sewing machine (removing the flatbed component) to reach into the tubular sleeve and sew slowly on all the curves.
- Thick seams: Sewing a flat-fell seam will require that you sew very slowly while you manually feed the cloth through, lowering the presser foot a little to make sewing easier.
- Multiple layers (jacket lining): When deciding how to sew a patch on a jacket, make sure you sew only the top layer and not the lining.
Sewing Patches on Specific Fabrics: What Changes
Knowing the basics is great, but applying an emblem to rigid leather requires a vastly different approach than applying one to stretchy gym wear.
Denim (jeans, jackets)
Denim is the most forgiving and historically common patch-sewing fabric. When figuring out how to sew a patch on jeans or a classic trucker jacket, a denim needle (90/16 or 100/18) is non-negotiable. Standard universal needles will rapidly deflect or shatter against the dense twill.
Use a strong cotton-poly blend thread; a heavier 40-weight thread is excellent for the thickest denim sections. The main challenge with denim is that overlapping seams can easily be 6+ layers thick at certain junction points. You must sew slowly over these speed bumps.
Style tip: Using a high-contrast thread in burnt orange or golden yellow (mimicking original Levi’s denim stitching) looks incredibly intentional and stylish.
Canvas and heavy cotton (bags, backpacks, work jackets)
In working out how to sew a patch on a backpack, you will need to take into consideration that needles used should be like those required for sewing heavy denim fabric. Since canvas is strong and tight, you need to use thick needles.
In stitching a backpack, one needs to be very careful not to pass needles and threads through the waterproof interior part of the backpack. In case you have to stitch by hand, use a thimble since canvas is stronger than any other material.
Polyester and synthetic blends (athletic wear, uniform fabrics)
A ball point or stretch needle must always be used on knits and synthetics. A sharp needle will cut the elastic yarn, leading to snags in the knit material. It is also advisable to loosen the stitch tension on your sewing machine because the stretchy material might pucker under the firm patch.
This type of patching works really well on synthetics since a quick press with an iron holds the patch in place temporarily without stretching. The stitches hold the patch in place permanently. Be sure to use only 100% polyester thread when patching a synthetic item. Cotton thread shrinks differently from synthetic clothes in the wash.
Leather (jackets, bags, vests)
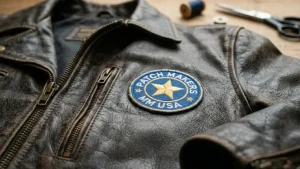
Many motorcyclists and fashion enthusiasts want to know how to sew a patch on leather. It requires highly specific tools. You must use a leather or wedge-point needle. Standard sharp needles will punch through unevenly, creating messy, jagged holes.
Never pin leather. The holes made by pins will not heal. Binders or double-sided tapes made of leather would be better for attaching the badge to the shirt. The process of hand-stitching leather would require the saddle stitch technique along with heavy, waxed thread.
In contrast, when sewing leather with the aid of a machine, the pressure would need to be greatly reduced, and the presser foot should be switched to one of these three kinds: Teflon, walking, or roller.
Military and tactical fabrics (Cordura, ripstop, MOLLE gear)
These are highly engineered materials that are extremely durable, yet actually very accommodating when using a regular heavy-duty needle. When sewing ripstop nylon, you should use a sharp-pointed needle (not a ballpoint) and proceed at a slow pace so as to ensure your stitches are perfectly even.
When sewing tactical equipment with Velcro strips, you have to actually sew the tape to the fabric on which you plan to mount the Velcro, as opposed to sewing the Velcro itself. Sewing through tough MOLLE webbing can be done much more accurately by hand with heavy waxed thread than by attempting to force it through under the presser foot of the sewing machine.
How to Reinforce an Iron-On Patch with Sewing
It is actually one of the highest searched queries in the customized clothing industry, yet oddly enough, it is a method that most businesses ignore altogether.
The truth is that the iron-on patch is made using an adhesive based on heat activation of a polymer compound.
Although initially very effective, the glue wears off when washed repeatedly, exposed to hot or warm water, or harsh detergents. In order to make sure that iron-on patches last, one has to go through a two-step approach. The result is the incredible convenience of reinforcing iron-on patches with sewing and the durability that comes with it.
Step-by-step reinforcement:
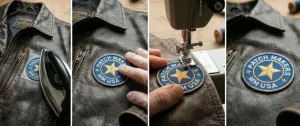
- Apply the iron-on patch following standard, high-quality iron-on instructions (always use a pressing cloth, use absolutely no steam, and press firmly for 30–40 seconds).
- Let the garment cool completely. Wait at least 2+ full minutes so the glue sets.
- Sew completely around the perimeter using a tight backstitch (if by hand) or a straight stitch (if using a machine).
- Focus your stitching precisely 1–2mm from the outer edge. This outer perimeter is exactly where iron-on adhesive most commonly begins to curl and peel first.
This robust combination approach is exactly what military quartermasters, uniform professionals, and heavy-duty workwear brands use as their standard operating practice.
Troubleshooting: Common Problems and How to Fix Them
Even when you know exactly how to sew on your new patch, things can occasionally go sideways. Here is how to fix the most common issues like a pro.
Patch is buckling or puckering
- Cause: The base cloth was not ironed flat before stitching, or you have been stitching under extremely high tension.
- Fix: Carefully remove the errant stitches using a seam ripper. Aggressively press the item to flatten it using an iron. Pin the badge away from the exact center and dramatically lower your thread tension.
The thread is breaking or knotting
- Cause: The problem could be that the thread tension is much higher than what it should be, the needle size is too small in relation to the thread thickness, or you are using very old thread.
- Fix: Tighten your sewing machine’s tensions, use a bigger needle size according to the thread thickness, and dispose of your old thread immediately and use new thread.
The patch shifted while sewing
- Cause: Insufficient use of pins, or the pins were placed too close to the edge, allowing the stiff emblem to rotate.
- Fix: Stop immediately. Remove the stitches, reposition perfectly, and add more pins (including a crucial anchor pin straight through the center). Consider investing in temporary fabric glue for future projects.
Stitches skipping
- Cause: A dull or damaged needle, the wrong needle type for the specific fabric, or an incorrect threading path.
- Fix: Replace the needle immediately (this is the most common cause of all machine issues); completely re-thread the upper path from scratch; check the bobbin case for trapped lint.
Visible stitches on the front when you wanted them hidden
- Cause: The needle is coming up entirely too far from the inner patch edge, or you are simply using the wrong hand-sewing stitch.
- Fix: Take time to practice on scrap fabric. Make sure to use a blind/slip stitch for truly invisible results, and adjust your needle path to stay just inside the thickest part of the patch border.
Patch Type-Specific Guidance
At Patch Makers USA, we manufacture a wide variety of styles, and knowing how to sew on your new patch depends heavily on its construction.
Embroidered patches with merrowed (overlocked) edges
The classic merrowed border is a thick, overlocked looped stitched edge that frames the design. It is incredibly easy to sew either directly through or just closely alongside.
- Sewing into the merrowed border: Use a very thin needle, carefully catching just the very base of the embroidered loops to hide the thread completely.
- Sewing alongside the border: Stitch exactly 1–2mm outside the merrowed edge onto the base fabric; this creates a highly attractive, clean double-border look. Knowing how to handle merrow edge patch sewing ensures your final product looks factory-finished.
Die-cut and laser-cut patches (no standard border)
Because there is no thick defined border to hide your stitches in, you must follow the exact, often complex patch outline precisely.
- Use a tight whip stitch or blanket stitch to thoroughly wrap and protect the raw, laser-cut edge from fraying over time.
- If machine sewing, you must slow down significantly at tight, intricate curves; use plenty of needle-down pivot points to navigate the complex geometry.
PVC patches
PVC patches are durable rubber compounds, and crucially, they absolutely cannot be ironed on without melting into a toxic mess.
- Sewing PVC patches: Always use a sharp leather needle; the rubberized patch material itself is incredibly thick and dense.
- Machine sewing PVC: Drastically reduce your presser foot pressure; use a Teflon non-stick foot if available so the rubber doesn’t drag.
- The Velcro option: Note that most tactical PVC patches come with a pre-applied Velcro backing. In many modular loadout cases, utilizing the Velcro is actually a better, more versatile attachment method for PVC than permanent sewing.
Woven patches
Woven patches are manufactured with a tighter weave, making them significantly thinner and flatter than standard embroidered patches. This actually makes them much easier for a needle to pierce.
- However, the thin edge of custom woven patches can occasionally fray if they are manufactured without a thick merrowed border. We recommend using a tiny dab of clear fray-check fabric glue on the raw edge before sewing to prevent this.
- Use light stitch pressure and a ballpoint needle if applying them to woven background garments to avoid pulling structural snags.
Sewing on Patches for Specific Items
Context is everything. You approach a denim pant leg differently than a structured baseball cap.
How to sew a patch on a jacket
This is the most typical custom situation and typically centers on the left chest area or the upper part of the bicep sleeve. With regard to the regular sleeve patching, just manage the problem with the restricted tube and put the sleeve on the free arm of your sewing machine or even do it by hand.
When considering how to sew a patch on a jacket back (a huge rocker measuring 12 inches on a motorcycle jacket, for instance), carefully place the patch while wearing the jacket because of the shoulder sag.
How to sew a patch on jeans
In the process of learning how to sew a patch on jeans, it becomes essential that you upgrade yourself to a thick denim needle for sure. When you are putting the knee patches to work for their functionality as a tough patch, then make sure that you sew through both layers, and the tough patch should be on the outer side without any rough edge rubbing against your skin.
How to sew a patch on a backpack
We often receive requests from clients about how to sew a patch on a backpack without damaging the item in question. First off, always be sure to stitch through the designated nylon outer shell section only.
You can never push your needle through the waterproof layer of inner lining or dividers in the bag. Always use excellent-quality fabric adhesive to hold the patch temporarily in place, especially when applying to thicker bag sections that may have structure.
How to sew a patch on a hat
Structured baseball hats have highly curved, rigid surfaces. For this reason, meticulous hand sewing usually gives you vastly more control than forcing a brim under a machine. Always pull down or temporarily unpick any inner sweatband or mesh liner before sewing straight through the hat crown.
Use a smaller, sharper needle. Remember that the front two panels of high-quality structured hats contain a stiff layer of buckram interfacing inside that you must smoothly pierce.
Frequently Asked Questions
What is the best stitch for sewing on a patch by hand?
The backstitch is unquestionably the strongest hand-stitch used for permanently sewing on a patch. This makes a neat and very strong seam without gaps that is very similar to the tight machine-stitched seam. Be sure to sew the backstitches very tightly spaced at 2–3mm along the complete border of the patch, as close to the edge as possible. When sewing a decorative patch where the stitches can be clearly seen, the whip stitch will make a beautiful wrapped edge and be much quicker to do than the backstitch.
Can you sew on an iron-on patch?
Of course, just like we have seen above, it is indeed the best, most professional way to attach any patches that will go through rigorous daily use and washing as well. First off, iron the patch firmly in place, and only thereafter begin your stitches all along the edges. The heat-adhesive backing not only allows the heavy patch to sit very firmly in its rightful place but also ensures precise positioning without any chances of shifting whatsoever before you finally sew it in.
What thread should I use to sew on a patch?
It is important that you consider ensuring that the thread matches perfectly with the color of the border of the patch that is thick in order to have flawless sewing where the stitches will not show. There is normally a thick border in embroidered patches, which can easily be found everywhere and will match perfectly with any choice of color that you decide to use. You should, however, choose a contrasting color that looks good with your patch design.
What size needle do I need to sew on patches?
Needles of the size 80/12 can perform efficiently on any type of lightweight material. However, where there are materials such as denims or canvases, then the appropriate needles to use in such cases would be 90/16 or 100/18 denim needles. This is because other types of needles may simply bend, deflect, or even break while trying to sew the above material. Sewing leather requires needles for leather, which should range between 90 to 100.
How do you sew a patch onto a jacket sleeve?
If you are working with a sewing machine, gently guide the sleeve tube over the free arm of the machine, which is a narrower and cylindrical arm extension. Pin the patch into place and sew carefully along the edges, making sure that your stitch line is 1–2mm away from the edges. In case you are working with an old-fashioned flatbed sewing machine that lacks a free arm, then hand stitching with the use of a thimble offers you much better control over the curved sleeve tube.
How do you prevent a patch from puckering when you sew it on?
The puckering causing frustration happens if you don’t make sure that your garment is smooth before sewing, if your machine is sewing really tight stitches, or if you slightly move your rigid piece during its application. It’s impossible to avoid the puckering completely except for washing and pressing the fabric beforehand. If you need to pin the garment to make it firm starting from its middle point, loosen a little bit your machine’s top stitch. While sewing, don’t drag or push the fabric through the feed dogs.
Can you sew patches onto leather?
Well, but only if it employs the proper equipment for this process. One needs a leather needle (having a wedge or cutting tip) and not the usual pointed needle. Under no circumstances should one ever pin leather together. The patch should be held down with binder clips or double-sided leather tape in the precise place one wants it. For heavy-duty motorcycle leather, hand-stitching using waxed thread with a traditional saddle stitch using two needles produces the most resilient effect. In case one uses machine stitching for leather, then use a Teflon or roller foot presser.
How do you sew a patch without it showing on the back of the fabric?
To ensure that your work is well-concealed behind the back part of your garment, begin by pulling your needle out of the back of the fabric near the edge of the patch so that the knot remains hidden properly. You must take an incredibly careful approach where you employ either the blind or slip stitch in place of the normal backstitch. It is important to use really small stitches, picking up the very top threads of your fabric every single time.
Is sewing or iron-on better for patches?
Each of them serves an individual purpose in the patch application process. The stitching process can be considered the most durable one but if speed is your top priority and you do not want to have any skills in sewing, ironing is your choice.
Ready to Apply Your Skills? Get Started with Patch Makers USA
Since you know just how to sew on your new patch on anything you desire, all there is left to do now is purchase high-quality, durable patches that match up to the skill of your sewing. Whether you need regular embroidered patches, intricate woven patches, tough PVC patches, or high-quality leather patches, we at Patch Makers USA will be happy to help you with your patch needs.
With our commitment to provide you with the highest quality patches around, you will know that your work is being put into good use by having the very best patches on it. Put your expertise in how to sew a patch on a jacket, bag, or uniform to the ultimate test. Get in touch with Patch Makers USA right away to get a free quotation for your unique design!
