
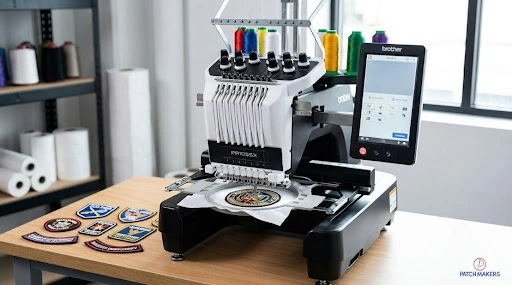
Every day at Patch Makers USA, precision takes shape, and millions of custom patches are brought to life through digital stitching on equipment ranging from basic Brother models to heavy-duty ZSK and Ricoma systems. What defines the best embroidery machine for patches is not prestige.
Instead, performance links directly to how well features like needle configuration, stitching pace, and frame dimensions align with output targets. Though names impress, function matters more when volume and detail drive results.
From crafting unique handmade items at home to growing a startup into full-scale manufacturing, this resource outlines essential specs, actual expenses, and insider insights from producers.
So decisions rest on clear, practical details. While budget matters, understanding how materials affect durability and shapes helps make smarter choices. One moment it might be about precision tools. The next moment, it could be a bulk order on a short deadline.
Step by step, even beginners find their footing when they untangle complexity. What seems minor today, like a mere voltage rating, could define reliability tomorrow. Behind every successful build lies prep work often overlooked.
Top Picks by Category
| Category | Top Recommendation | Key Highlight | Estimated Price |
| Best Budget/Home | Brother PE800 | 5″×7″ Hoop, User-Friendly | ~$350 – $600 |
| Best Small Business | Janome MB-7 | 7 Needles, Reliable Tension | ~$2,500 – $3,000 |
| Best Commercial | Brother PR1055X | 10 Needles, Live Camera | ~$5,000 – $6,000 |
| Best Industrial | SWF MAS-12 | 12 Needles, Heavy Duty | $8,000+ |
What to Look For in an Embroidery Machine for Patches (Before You Buy)
Every machine has limits. Hence, you must find the best machine for making patches. If it works well on towel designs, it might not with tight stitches for a polished merrow edge. Patch results depend heavily on what the equipment can actually handle. Knowing this shapes how you choose which model to explore next. This process is exactly like using a board marker to make a thin line on a piece of fabric.
1. Hoop Size vs. Patch Dimensions
A hoop’s dimensions and sizes set the upper limit for how large a design can be stitched. Though a typical 4-inch by 4-inch frame works fine for compact chest logo patches or embroidered labels on clothing, its constraints become obvious rather quickly. Let’s have a look at a few popular hoop sizes:
- A 4 inches by 4 inches hoop works well when handling round designs, tiny graphics, or emblems shaped like shields. The size fits compact artwork neatly without extra space around the edges.
- A patch measuring 5 inches by 7 inches works best for typical curved or straight shoulder patches. This size fits comfortably within common uniform layouts.
- A hoop measuring 7 inches by 12 inches or more proves useful when handling big backing patches. Alternatively, it supports gang-hooping, where several smaller patches are stitched together during a single session for efficiency. This setup helps reduce repeated adjustments. Some prefer it for maintaining consistent tension across wider areas. It works well when precision matters less than workflow speed.
The patch size is equally important. Planning optimal patch sizes ensures a perfect fit when working on most machine hoops and enhances the final look of the fabric surface it is attached to.
2. Needle Count: Single-Needle vs. Multi-Needle
A major decision involves choosing between machines that have single-needle vs. multi-needle patching capabilities.
Single-Needle: Stopping the machine yourself to color-switch with a single needle is not the best. Changing spools by hand works okay when only one or two hues appear. Yet complexity slows progress sharply beyond that point.
Multi-Needle: Switching seamlessly among 4 to 15 pre-set needles, the device handles complex color patterns independently. Because it changes tools/threads on its own, detailed designs take shape without frequent oversight. Efficiency comes not just from speed but from uninterrupted operation during longer runs.
3. Stitch Speed (SPM)
Each minute, a machine produces a certain number of stitches, or Stitches Per Minute (SPM). That count reflects how fast it operates. Speed depends on output within sixty seconds. Performance ties directly to stitch volume per interval. The rate appears as a numerical value tied to time.
Sitting at home, machines usually run between 400 and 600 strokes per minute.
Some commercial machines run between 800 and 1,200 stitches per minute. Since speed matters in output, pushing fast seems logical, yet fragile threads change that rule. Metallic or glow-in-the-dark varieties tend to snap unless the pace is reduced. For these materials, cutting the rate to around 400 SPM helps avoid damage during stitching.
4. File Format Compatibility
One machine might not understand the machine language the other ones do. To get things working, you need a digital file that matches how your device reads data.
PES finds its place with Brother machines, also adopted by Baby Lock. JEF serves Janome models specifically. DST, though, stands as the format shared across Tajima, Ricoma, and SWF, making it common in the universal commercial standards.
Best Embroidery Machines for Patches at Home (Hobbyist & Small Batch)
Starting fresh? These tools strike a mix of low cost and solid performance. Ideal for picking up digitizing skills while making short batches for pals or community groups.
#1 Brother PE800
A popular starting point for those making patches? The Brother PE800 for patches fits that role perfectly. With space to handle nearly every common patch dimension, its 5″×7″ embroidery area proves practical. One needle guides each stitch, making it simple, focused, and built for precision tasks.
Specifications Table:
| Feature | Detail |
| Hoop Size | 5”x7” |
| Max Speed | 650 SPM |
| Needles | 1 (Single) |
| File Format | PES |
Why it is good for patches: What makes it work so well for patches is how smoothly it manages dense satin stitching without costing much more than budget models. Instead of guessing angles, users adjust patterns directly through the display using tools that flip or turn artwork easily. Even small layout changes become manageable thanks to live previews during edits.
Pros: While ease of use stands out, help is widely available across forums and guides. Though priced low, its functionality remains strong through shared knowledge.
Cons: A solitary needle requires repeated hand adjustments during work. Internal parts are largely made of plastic. Though functional, material choice may affect durability over time.
Verdict: Best for hobbyists, especially when crafting basic designs with just 1 to 3 colors. In this scenario, a simple patchwork is the best choice, where detail takes a back seat. For limited color needs, this option holds steady without fuss.
#2 Janome Memory Craft 500E
The MC500E is a significant step up in build quality and hoop real estate, offering a massive 7.9″×11″ embroidery area.
Specifications Table:
| Feature | Detail |
| Hoop Size | 7.9″×11” |
| Max Speed | 860 SPM |
| Needles | 1 (Single) |
| File Format | JEF |
Why it is good for patches: Fewer interruptions happen when using the multi-hoop. It holds multiple patches at once, so 4 or 6 small ones can be positioned within a single frame. Stitches run through each without rehooping, cutting preparation effort down. Arranging several pieces together means less handling overall and reduced setup time.
Pros: A generous hoop size allows more design space. Despite minor quirks, thread tension stays consistent across projects. Stitch quality remains sharp and clean throughout use.
Cons: It is pricey for a single-needle model and has a heavy footprint.
Verdict: Best for the “prosumer” who needs a mid-range option that suits users wanting bigger coverage but not the $5k+ expense of professional multi-needle devices. While high-end models are sought after more, this alternative meets practical demands at a fraction of the cost.
Some might overlook it for flashier systems, yet its size and pricing stand out. For those stepping beyond basic tools, without chasing premium labels, it is ideal.
Best Commercial Embroidery Machines for Patch Production
A single needle won’t suffice when handling steady patch orders, a multiple-needle machine becomes essential, not a luxury anymore. Built to run nonstop, they handle eight or more hours every day without strain, helping you achieve your bulk orders in due time.
#1 Brother PR1055X (The Entrepreneur Pro)
Efficiency defines this model, favored by small business operators. With 10 needles working at once, precision improves. Especially with a built-in camera that efficiently guides where designs go.
Specifications Table:
| Feature | Detail |
| Needles | 10 |
| Hoop Area | 14”x8” |
| Max Speed | 1,000 SPM |
| Format | PES, DST |
| Price | ~$5,000+ |
Why it’s good for patches: Seeing your design’s exact placement on fabric becomes possible thanks to InnovEye Plus camera tech. When aligning edge geometry on premade patch bases, precision matters, and this feature delivers it without fuss. Placement errors drop sharply once visual feedback turns immediate and accurate.
Pros: Built-in alignment cuts thread placement time dramatically with the machine having automatic needle threading. Quick initialization means less waiting between steps and a fast setup.
Cons: The initial investment is expensive. Maintenance needs expert attention on a recurring basis.
Verdict: Best for established small businesses already operating at a growth stage, moving toward higher output.
#2 Ricoma EM-1010
The Ricoma is a compact 10-needle model shaped around startup needs. Its lightweight design favors flexibility and portability (easy to transport for mobile events), yet it handles high-volume work without strain. The Ricoma embroidery machine for patches, as reviewed by a growing patch manufacturer, shows how well it holds up to producing bulk orders with almost no complications.
Specifications Table:
| Feature | Detail |
| Needles | 10 |
| Max Speed | 1,000 SPM |
| Memory | 20 million stitches |
Why it is good for patches: Handling DST files comes naturally to it, since these remain the go-to format for precise digital embroidery and high-quality digitizing. Despite their complexity, processing them feels effortless here.
Pros: Portable and lightweight design makes transport effortless. Technical support teams respond quickly, resolving issues without delay. A ten-needle setup usually costs more, yet this model stays affordable.
Cons: Working with some thread types may cause uneven tension. The display is smaller compared to the Brother.
Verdict: Best for entrepreneurs needing heavy output without taking up much space. Despite its compact size, it handles large workloads efficiently without sacrificing performance. Small ventures with limited floor areas will find this model especially useful for making their custom embroidered patches for their customers.
Best Embroidery Threads for Custom Patches: Production Secrets
In our facility, we don’t just pick colors. We also pick the performance and prioritize it. The thread you choose dictates how many times your machine will break the thread. The choice of the thread will directly impact your profit.
Polyester vs. Rayon: The Manufacturer’s View
| Feature | Polyester (e.g., Madeira Polyneon) | Rayon (e.g., Madeira Classic) |
| Durability | Extremely High | Moderate |
| Bleach Resistance | Yes | No |
| Luster | Semi-Gloss | High Silk-Like Shine |
| Best For | Uniforms, Workwear, Gear | Fashion, Delicate Items |
Our Recommendation: For 95% of patch types, 40 wt. polyester thread should be used. The thread is durable enough to sustain high-speed wear from commercial sewing machines, and it will not fade when washed. There are times when 60 wt. thread may be used, such as for tiny (smaller than 4 mm in height) or highly detailed letters or prints to prevent “letter filling.”
Choosing the Right Stabilizer for Patch Embroidery
A shaky base ruins even the best fix. When support lacks strength, fabric pulls unevenly. Too much thickness brings another problem of snapped needles mid-stitch. A woven patch with the right stabilizer can resolve these issues.
Cut-Away Stabilizer: A thin backing stabilizer for embroidery patches remains once excess material gets trimmed off. What makes this type work well is how it locks stitches into place. Support comes through during stitching, so the border edges hold firm. Structure builds quietly beneath tight rows of smooth thread. Long-term strength arrives by providing structural support for dense satin-stitch borders.
Tear-Away Stabilizer: Tearing away one works best when the design stays minimal or slips beneath another secondary layer. Patches tend to shift since it rarely locks the cloth firmly in place (drum-tight).
Water-Soluble (Wash-Away): When crafting free-standing lace (FSL) designs, a water-soluble support makes edge cleanup effortless by dissolving completely, leaving smooth borders behind. This type of backing works best if trace-free results matter most after washing away residue.
DIY Machine vs. Ordering Professionally: Real Cost Comparison
Before you invest in a $5,000 patch-making machine, we need to consider the actual costs (hidden costs) associated with making your patches. Below is a comprehensive DIY embroidery patches vs ordering comparison:
DIY Completion of Setup (Year 1 Estimate Costs)
- Cost for Machine (Brother PR1055X): $5,000
- Cost of software for digitizing like Hatch or Wilcom: $1,000
- Supplies and materials (Thread, stabilizer, and fabric): $300
- Time spent on skill acquisition (Learning Curve): 100+ hours of training
- Total Setup: ~$6,300
Ordering from Professional Patch Maker (PatchMakers USA)
- Order of 100 Patches: ~$250 – $400 (all-inclusive)
- Cost of Digitizing: Included or low one-time fee.
- Delivering Time: 7 to 10 working days (delivered to your door).
The Breakeven Point: It takes approximately 1,500 to 2,000 patches for the cost of the machine to break even (compared to ordering). Therefore, DIY is a hobby if you make 10 patches per month, but buying the machine is an intelligent purchase and smart investment if you are making 500 patches per month.
Manufacturer’s Tip: A great way to use the industrial machine is to hybridize with our clients. They buy a small Brother PE800 to prototype designs and verify sizes. They then send us the finalized designs so that we can produce the bulk order using our industrial machines. This approach allows for creative control with less overhead.
7 Expert Tips for Better Patch Embroidery
Tip 1 (Hoop Drum-Tight): A slight shift in cloth of a millimeter can throw off the edge entirely and ruin border alignment. The tension should be tight enough that a tap can produce a drum-like sound.
Tip 2 (Use a 75/11 Sharp Needle): A 75/11 needle with a sharp tip works well on twill or canvas because it cuts through threads cleanly. Unlike rounded tips, this one pierces, causing cleaner edges. Precision improves when the tool matches the material’s structure.
Tip 3 (Satin-Stitch Borders): A smooth border begins when a broad satin stitch wraps the edge. Aim for 3.5 mm or 4.0 mm wider, at least. This tight line of stitching seals exposed fabric, stopping threads from loosening over time. Width matters here, because anything narrower may fail under wear/tear. Finish each piece this way, letting dense stitches act as a shield against fraying and unraveling.
Tip 4 (Slow Down for Metallics): When working with metallic threads like gold or silver, reduce machine speed to about 400 stitches per minute. Because these fibers hold their shape tightly, fast stitching tends to twist them until they snap. Lowering the pace helps prevent kinks from forming during operation. Thread integrity stays better when movement is more controlled. Speed adjustment becomes necessary simply due to how the material responds under tension.
Tip 5 (The Lighter Trick): A small flame passed along the edge border transforms tiny polyester threads into a clean finish. Heat seals the perimeter soon after trimming the piece free. Edges gain a refined touch when fire just grazes them, melting microscopic polyester fibers. A flickering lighter redefines texture near seams, instantly giving a professional merrowed look.
Tip 6 (Test on Scrap): Start with a sample. Use leftover cloth before touching the main piece. Check stitch density on the same leftover fabric so seams lie flat without sinking or puckering. Mistakes happen, and it’s better they do on waste fabric than work material.
Tip 7 (Print Your Mockup): Run a test by printing the design mockup on paper at 100% scale using your software. From there, scissors shape the outline neatly. This cut version then sits directly on the clothing item. Placement checks happen only before hitting start on the machine. Hence, before activating the machine, confirm the position by eye.
Frequently Asked Questions
Skip the Setup and Get Professional Results
After reading the blog, if the idea of a do-it-yourself setup seems out of reach due to steep costs, support remains available. Thanks to our high-performance industrial equipment paired with skilled digitizer specialists, your brand gains strong visual quality without the $5,000 price tag.
Patch Makers USA stands out across the country as a top choice for custom patches. Many people return again and again because the quality stays strong every time. Designs come through just as imagined, sharp and clear. Experience shows in every detail, built to endure regular use. Longevity meets precision without extra cost or hassle.
Reach out today without any delay by contacting our expert team for free. Creative custom patches can renew your worn clothing and equipment, giving them a fresh role through imaginative details captured in the real world.
