

That old logo on your staff hoodies is not the vibe anymore. The project name on your jackets changed. Someone stitched the wrong patch on all the caps. Throwing everything away is expensive. Keeping the wrong branding on display is worse.
That leaves you with one big question: How do you remove an embroidered patch without shredding the fabric, fuzzing the surface, or leaving a big shiny glue stain where your brand used to be?
Good news: with the right tools, the right method, and a little patience, you can remove a sewn on patch or embroidered logo and still keep the garment in rotation. This guide breaks it down in clear, brand friendly steps so you do not have to panic every time you rebrand, update a logo, or refresh uniforms.
Step 1: Know What You Are Removing
Before you touch a seam ripper, figure out what you are dealing with. According to the patch build, decide how you should remove it.
Ask yourself a few quick questions:
- Is this a sewn on patch, or is the embroidery stitched directly into the fabric
- Is there backing on the inside of the garment
- Does the patch feel stiff, almost plastic on the back (that often means adhesive)
Sewn patch vs iron on vs combo
- Pure sewn on patch
- You can see stitching holding the patch down.
- There is usually thread on both the patch edge and inside of the garment.
- Iron on patch
- Back of the patch has a glossy or rubbery layer.
- You may not see any stitching at all.
- Hybrid patch (stitched and heated)
- The patch is both sewn and heat fused.
- You will have to remove stitching first, then deal with glue.
If your patch is iron on or partly fused, it is worth checking How to Remove Iron On Letters & Patches: A Step by Step Guide. That article pairs nicely with this one when you are dealing with heat based adhesives.
Here, we will focus mainly on how to remove an embroidered patch that has stitching involved, then clean up what is left behind.
Step 2: Get Your Patch Removal Toolkit Ready
The easiest way to remove anything cleanly is to respect the tools. You do not want to attack a delicate bomber jacket with kitchen scissors and hope for the best. Here is a smart, low budget setup:
- A good seam ripper (non negotiable if you want the easiest way to remove embroidery)
- Small, sharp embroidery or nail scissors
- Tweezers for pulling loose threads
- A lint roller or tape for cleaning up fuzz after you remove embroidered patch threads
- A soft brush or old toothbrush
- Optional: fabric shaver for minor fuzzing after you remove embroidery patch
- Optional: mild adhesive remover for glue residue (we will talk about that in the second half)
If you are a brand or business with a lot of uniforms, keeping a simple “embroidery removal kit” in house can save you a ton in rush replacement orders.
Step 3: How To Remove A Stitched Patch Without Wrecking The Garment
This is where the real work begins. Whether you want to remove a patch from a shirt, take embroidery off a jacket, or get a patch off a hat, the rule is always the same: go slow, work from the back, and never cut blindly.
3.1 Work from the inside first
Turn the item inside out.
You are looking at:
- The bobbin threads that hold the patch in place
- Any backing material if the patch was stabilized
Use your seam ripper to carefully slide under those bobbin stitches and cut them every half inch or so. You are not trying to tear everything at once. Think “unlacing” instead of “ripping”.
This is the safest method if you are wondering how to remove embroidery with backing or how to remove sewn on patches from thinner shirts and polos.
3.2 Peel and check from the front
Flip the garment back right side out. Gently lift one edge of the patch with your fingers.
- If stitches are loose, the patch should start to lift.
- If one side is still stuck, stop and go back to the inside.
Repeat until the patch comes off. That is the correct way to remove a sewn on patch from a shirt or hoodie without ripping the fabric.
Key rule: if you feel resistance, do not yank. That is how tiny holes happen.
3.3 Handling thick jackets and structured pieces
When you remove an embroidered patch from a jacket, especially denim or a heavy custom bomber jacket, you are dealing with:
- Thicker fabric
- More aggressive thread tension
- Possibly multiple stitching passes
Use this approach:
- Inside out.
- Seam ripper on the inside stitches only.
- Short, controlled cuts.
- Check the front every few minutes.
This same method works when you take an embroidered patch off a jacket or remove patch from jacket where the patch is on a sleeve, chest, or back panel. For caps and hats, the curve makes things trickier. To remove a patch from a hat or do custom hat logo removal, you can:
- Stuff the hat with a small towel to create a firm surface.
- Work from inside the front panel with the seam ripper.
- Keep your non cutting hand pressed firmly on the area to avoid stretching.
Step 4: What If The “Patch” Is Actually Direct Embroidery
Sometimes, there is no separate patch at all. The design is stitched directly into the garment. That is when people search things like:
- how to get embroidery off
- how to remove embroidery patch (even though it is not a true patch)
- how to take embroidery off a shirt
- how to remove embroidery without damaging clothing
Here is the honest truth:
- You can remove embroidered logo stitching.
- You cannot always erase the ghost of where it used to be.
Heavier fabrics like denim, canvas, and thick hoodies handle direct embroidery removal better. Lightweight polos, performance tees, or satin jackets are much easier to damage.
The method is similar to patch removal:
- Turn inside out.
- Use a seam ripper to cut the bobbin threads.
- Gently tease the top threads loose from the front.
- Use tweezers and a lint roller to pick up any leftover bits.
If you are asking “does removing embroidery damage fabric” the real answer is: it can, especially when the stitch density was high. That is why a lot of brands choose to put a patch over embroidery instead of taking everything out. A clean custom patch placed over an old logo is often safer and faster than trying to erase it.
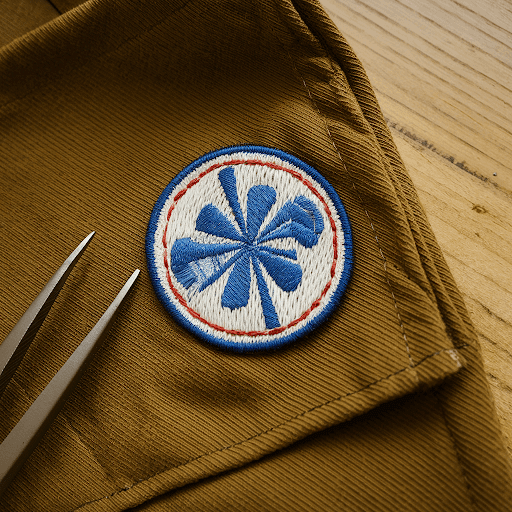
Step 5: When To Stop And Cover Instead Of Remove
There is a point where trying to remove a stitched patch or logo becomes more risk than reward. You should seriously consider covering instead of fully removing when:
- The fabric is thin, stretchy, or delicate.
- The embroidery area is large with a lot of needle holes.
- You have already tried to get stitching out of clothes and the surface looks worn.
In those situations, the easier play for brands is:
- Carefully trim any obvious loose threads.
- Leave the base area intact.
- Add a new custom embroidered patch or woven patch over the old area.
It saves the garment and still gives you updated branding. Once you are ready to rebrand, you can design your own patch and order new custom logo patches for hats, hoodies, jackets, or uniforms in one go instead of throwing everything away.
Step 6: Clean Up Time (Removing Glue, Ghost Lines, And Shine)
Once the patch or embroidery is off, you will usually see:
- A faint outline
- Small needle holes
- Maybe a shiny spot or glue residue
This is where a lot of people start searching for how to remove patches in the deeper sense, not just the fabric on top.
For adhesive residue, you will want to read How To Remove Patch Glue: Effective Methods For Different Fabrics, Clothes & Shirts. That guide dives into fabric specific methods and products that will help you remove glue without burning, bleaching, or melting your garment.
Basic clean up tips after you remove embroidered patches or logos:
- Use a soft brush to lift the nap of the fabric.
- A gentle steam pass can help needle holes relax.
- On dark fabrics, avoid harsh scrubbing that can create light spots.
- On hats and structured fronts, support the area from behind while you work.
Step 7: Fabric Specific Tips So You Do Not Wreck The Goods
Different fabrics react very differently when you remove an embroidered patch or logo.
Denim and heavy cotton
- Handles removal well.
- Minor needle marks usually blend in after a wash.
- Great candidates if you want to take patches off a jacket and rebrand.
Hoodies, sweatshirts, and knit fabrics
- Go slowly when you remove embroidery patch from jacket styles like fleece or knit.
- Stick to seam rippers instead of big scissors.
- Support the fabric from the back with your hand to avoid stretching.
Polos and performance wear
- These are the most sensitive when you remove embroidered logo from clothing.
- Too much picking or cutting can distort the knit permanently.
- Consider covering with a new patch instead of full removal.
Hats
- Structured caps can crease easily.
- Always support the front panel from inside with a towel or soft block.
- Work patiently and avoid soaking the front with liquids.
If you ever feel lost, a local tailor or embroidery removal service can be worth the cost for high value uniforms.
Step 8: When DIY Removal Is Not Worth It
Not every project should be a home experiment. Skipping DIY is smart when:
- You have hundreds of uniforms to update.
- The garments are expensive outerwear or premium branded apparel.
- The embroidery covers a large part of the chest or back.
In those cases, it can be more cost effective to:
- Replace a portion of the uniforms.
- Or cover the old mark with fresh custom patches instead of trying to erase everything.
You can buy custom patches online, order custom embroidered patches USA wide, and work with a custom patch maker near me style partner like Patch Makers USA to handle both design and production. For many brands, that ends up cheaper than losing a whole run of jackets or hoodies trying to fix one logo.
FAQs
Can you remove an embroidered patch without damaging fabric?
Yes, in many cases you can remove an embroidered patch cleanly if you go slow, work from the inside, and use a seam ripper instead of tearing. Damage usually happens when people rush or cut into the base fabric while removing stitching.
What is the easiest way to remove embroidery from clothing?
The easiest method is to turn the garment inside out, use a seam ripper to cut the bobbin threads, then gently pull the top threads away from the front. Finish by using tweezers and a lint roller. That is the safest way to remove embroidery without damaging clothes.
Can you remove a sewn on patch from a jacket and reuse it?
You can often remove a sewn on patch from a jacket intact if you are careful, but it may have loose threads or a rough back. It is possible to reuse it, but for professional branding, most companies prefer fresh custom patches instead of reused ones.
Can you take off iron on patches once they are fused?
Yes, many iron on patches can be removed with controlled heat and careful peeling, but you will usually have glue residue left behind. That is where a dedicated glue removal method comes in, which is why the patch glue blog is helpful.
Does removing embroidery always leave marks?
You may see light needle holes or a faint outline, especially on lighter or smoother fabrics. Over time and after a few washes, that often softens. On delicate fabrics, you are usually better off placing a new patch over the area instead of trying to erase every trace.
Is it better to cover embroidery with a patch instead of removing it?
If the logo is large, the fabric is delicate, or you are worried about damage, yes. Putting a custom embroidered patch or woven patch over the old design is often safer, faster, and cleaner than trying to completely remove an embroidered logo.
Where can I get new patches after I remove the old ones?
If you are ready for new branding after removal, Patch Makers USA makes it easy to order custom embroidered patches USA wide, buy custom patches online, and create custom logo patches for hats, hoodies, jackets, and uniforms with pro level quality and fast turnaround.
Ready for a Fresh Look? Patch Makers USA Has You Covered
If your team is staring at a stack of jackets and asking “how do we remove all these patches without wrecking them”, you do not have to guess. Use this guide for the careful removal, then let Patch Makers USA handle the fun part: designing the new custom patches that your staff will actually be proud to wear.
